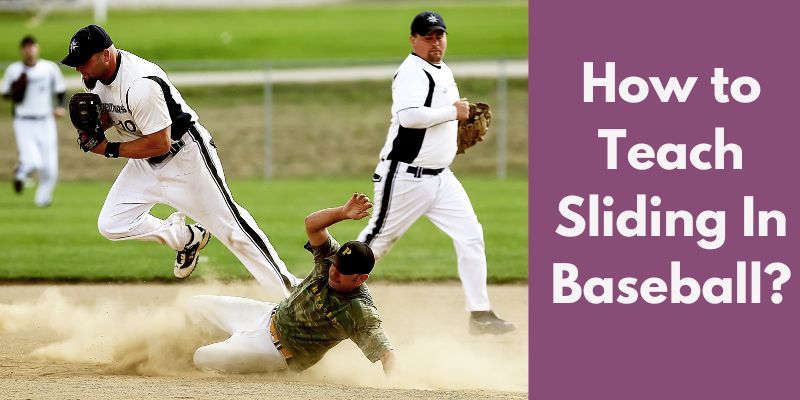
Sliding the bases is fun and an adrenaline-filled activity for baseball players. It is a significant accomplishment to cross home plate and start another board run for the team. Before scoring, there is a lot you need to know about sliding the bases.
You need to know when you should advance, hold up and slide. The question in most beginners is, “how do I slide?” Here is how to teach sliding in baseball. As with most sports, learning as early as possible is easier. Coaches find it easier working with the young.
Why Do Baseball Players Slide?
When playing baseball, the more logical option would be to keep running. However, baseball players slide into the base because it gives them more allusiveness. In baseball, the fielder only needs to catch the ball and touch the base the runner is headed to oust them.
This is known as force-play, and when it is not in effect, the fielder has to tag the runner to get them out. Tagging is having the ball securely in hand and touching the runner with the glove holding the ball.
For the tag to make sense, the fielder must touch the runner before touching the base and still have control of the ball. A fielder stays near the base and catches a throw from a teammate who throws the ball. Sliding forces the fielder to catch the ball and sweep down to catch the runner.
Read Also: Best Baseball Bat For Beginners
How to Teach Baseball Slide
Parents or coaches may ask how to teach baseball slide. Your student must first become comfortable throwing themselves on the ground while running at full speed.
The most common type of slide is the feet first slide. However, before your student attempts the full-speed slide, they must familiarize themselves with the different sliding aspects.
- Sit in the Sliding Position for a Few Minutes
Before the player attempts a slow-motion slide, ask them to familiarize themselves with the sliding form. Ask them to sit on the ground in the sliding form for a few minutes. Ask them to raise their hands and tuck their chins.
2. Bent-Leg Sliding
Bent-leg sliding involves the student leading with their dominant foot. They should stretch the leg straight and bend the non-dominant leg, tucking it under the dominant knee. The body part that does the sliding should be the thigh and shin of the non-dominant leg.
3. Keeping Hands Up and Their Chin Tucked
Let the player get into the sliding position. Ask them to lift their hands past their head and stretch their arms away from their bodies. This action stabilizes their sliding bodies.
It also makes it harder for the defender to tag the player’s hand with a glove or hand. Tucking the chin in their chest prevents the head from flopping backward and hitting the ground.
4. Sliding Practice
The first few practice slides should be at jogging or walking speed. At low speed, they won’t slide on the grass. These simulations help the players know how far from the base they need to drop and slide.
They should start the slide when the distance between them and the base is about their body length. The taller the player is, the further back they fall into position. They must learn not to slide too soon or too late. If too late, they slide past the base; if too early, they won’t reach the base.
5. Practice on a Soft Mat
Before attempting to slide in the dirt, let the players use a grassy surface or mat. The practice prepares them mentally for the task ahead. Ask them to take their time before transitioning from sliding at jogging speed to running.
6. Finally, Practice on the Dirt
The last phase should happen on a dirt base path. The point is to ensure the sliding comes naturally. The players should ensure they make contact with the base with their toes while the rest of the body is on the base. If your body is off the base, the defender can tag them out.
How to Teach a Child to Slide in Baseball
How to teach a child to slide in baseball and how to teach sliding in youth baseball are often asked questions. Anybody can learn how to slide in baseball.
Successful slides involve generating a lot of momentum during the run. An excellent sliding requires the player to maintain a running speed and simultaneously lean back and drop to the ground. For younger children, the coordination of these two actions is a challenge.
Some children are eager to learn the slide, while others are scared of getting hurt. Teaching a child to slide takes a bit of time and patience. The premise of teaching a child to slide in baseball is the same as described above but simplified in a way they can understand. A coach doesn’t need much in how to teach sliding in youth baseball. The youth are older, and their coordination is more advanced than the younger children.
Step 1
Let the children sit facing you and ask them to follow your lead. Extend both legs in front of you. Demonstrate with one foot tucked, and then tuck the other foot. Ask them to tuck the foot they are comfortable with. This positioning creates a bent-leg slide or the number 4 (Figure-4 sliding position)
Step 2
While in the bent-leg position, let them place their hands on their knees. Tell them to imagine they are on a fun rollercoaster ride that is descending a high drop. When you yell Ready band Slide, they throw their hands over their heads. Repeat several times.
Step 3
While still on the roller coaster drill, tell the kids to lean back with their hands still in the air until they are on their backs. Emphasize their hands should be off the ground. Repeat several times.
Step 4
Set out several bases about 15” apart. Break them into groups and put one group per base. Line them about 40” from each base and prepare them to run. Ensure they remove their shoes and run in their socks for safety or run with sneakers.
It takes time and numerous repetitions to get it. The children might get frustrated, so they must understand this.
What Is a Sliding Mitt Used For?
The sliding mitt’s purpose is to protect the base runner’s hands and fingers from injury. Players wearing a sliding mitt protect their hands, fingers, and wrists from field injuries.
Baseball players do not bat with the mitt on. They take the mitt from the coach after they get on base after a walk or hit. They wear the mitt and put their batting gloves in the back pocket. The players wear the sliding mitt on either hand during the game.
Some opt to wear the glove on the hand used for throwing, while others wear it on the hand that leads during a slide. It boils down to the players choice. A player usually wears the mitt on the one hand and keeps the other hand free.
How to Teach Youth Baseball Swing?
Young ball players do not need to master the mechanics of ball hitting. The best thing to teach them is confidence. As a coach, you must prepare the athletes to leverage their body movements to make more ball contact.
A good hitter knows how to deal with the game’s dynamics. Most of these youth admire BLB players, and they hit the ball successfully after many trials. However, when they start practicing, they forget how hard it can be and get frustrated. All they need is more drills to get better at it.
Conclusion
Teaching how to slide in baseball is not as hard as it sounds. The important thing is to keep practicing and not give up. Even the best BLB players practiced for ages before they got it right!


