If you are a baseball enthusiast, you understand how important it is to have the best baseball glove. However, sometimes your glove may become excessively stiff, meaning that it will be difficult for you to enjoy the game.
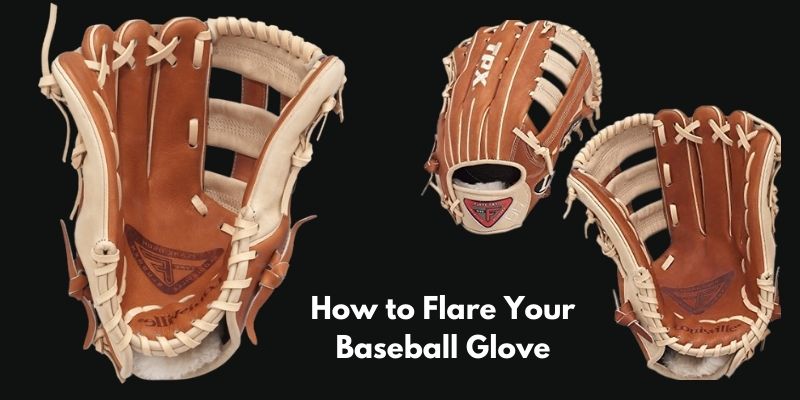
When this happens, you may need to stretch the glove through a process known as flaring. In simple terms, flaring a glove involves using heat to stretch the thumb and fingers section.
After flaring, the glove looks like a large web structure, and that helps to keep the ball in your hand when you catch it. In this guide, I will take you through how to flare your baseball glove safely.
Why should you flare your baseball gloves?
Some of the benefits of flaring your baseball gloves are:
- Safety – Flaring a baseball glove enhances the protection of your hand in case of a collision.
- Greater surface area – Flaring your gloves provides a greater surface area for catching the ball. As a result, it will be easier to play the game.
- Better grip – Flaring enhances your grip and the overall feel of the glove.
How to flare a baseball glove
Below are the steps you should follow in flaring your glove:
Requirements
- The glove
- A baseball
- Shoelaces
- An oven
- Glove oil
Procedure: Flare a baseball glove
1. Preheat your oven
The first thing you need to do is preheat the oven by setting the temperature to about 200˚ F.
2. Oil the glove
As the oven is preheating, you can oil the glove. Spread the fingers of your baseball glove for easier oiling. You should ensure that you are using the best oil for baseball gloves, such as the Glovolium Baseball Glove Oil Breaking Kit.
It is also important that you check the glove oils recommended by the manufacturer since using the wrong oil may cause damage to the glove. Apply a few drops of the oil onto the fingers, laces, and back of your glove. Never use water for softening the glove.
Also, avoid using ordinary oils such as olive oil and petroleum jelly because they do not work well with leather.
3. Place the glove in the hot oven
After oiling, it is now time to put the glove on an oven rack inside the oven for not more than 5 minutes. To protect the glove from burns, avoid using too high a temperature. Instead, you should use a 200˚ F temperature or less.
4. Check flexibility
Once you have removed the glove from the oven after 5 minutes, confirm whether it is flexible or not. If it is not flexible enough, you can return it to the oven for another few minutes and then check the flexibility again. You should continue doing this until the glove becomes easy to adjust.
5. Stretch the glove
If you have applied the required amount of heat to the glove, it will be very easy to stretch. Stretch the finger stalls to ensure they conform to the shape of your hand. Avoid using excess pressure when stretching.
6. Build a pocket
Once you are comfortable with the glove’s grip, or when it is flared to your requirements, you will then create a pocket. Take a baseball and put it in the glove pocket.
Then, tie down the pocket around the ball using a shoelace. Let the glove remain this way overnight to form the correct shape of finger stalls and thumb. This process gives you well-defined pockets.
7. Repeat
Repeat the above steps if the glove has not yet attained your preferred shape. Once you have finished, or when you are comfortable with the appearance, you should apply a layer of leather conditioner all over the glove to soften and protect it. Leather Honey Leather Conditioner is one of the best baseball glove conditioners on the market.
Frequently asked questions
Is flaring a baseball glove beneficial?
Yes, flaring a baseball glove creates a flat and shallow pocket that gives you a larger surface for catching the baseball. It is also helpful for infield players who require transferring the ball faster.
Should outfielders flare their gloves?
Flaring is suitable for both infielders and outfielders because it helps to create a large surface area for catching the ball. However, it is most beneficial for infielders since the shallow pocket proves a quicker transition from the glove to your hand.
Flare Vs Roll baseball glove — what are the differences?
Unlike flaring gloves, which helps to stretch the fingertips of the glove, rolling enables the glove to maintain its cupped shape. To roll a baseball glove, you need to first place a ball at the bottom of the pocket and then fold the glove in half over the ball.
Ensure that a crease is formed at the point where the pocket connects with the finger stalls. Tighten the glove and then tie it firmly using shoelaces or rubber bands. Remove the ball and then wrap the glove; leave it for some time and then unwrap it.
Why should I apply heat when flaring my baseball glove?
To flare your baseball glove, you must use heat because this softens the glove more quickly. You need to ensure that you have applied the appropriate amount of heat. Initially, you should apply the lowest amount of heat for less than 5 minutes.
Which oil should I use on my baseball glove?
You need to know that not all oils are compatible with baseball gloves. To prevent damage, you should only use glove oils that are recommended by the manufacturer.
Conclusion
If you have been wondering how you can make your baseball glove more comfortable, flaring will be the first thing to try. The good thing about flared baseball gloves is that they give you a better grip due to the large surface area. Besides that, they give your hands better protection in case of collision.
Knowing how to flare your baseball glove is very important for all baseball players because they will no longer need to worry that the glove will become stiff.
If not done correctly, you can easily damage the glove, so closely follow all the tips I have shared if you don’t want to spoil the quality of your glove.


